Thursday, October 6, 2016

Cards for a Cause

Hello Crafty peeps!!!

This is the first time when I'm doing something for our Indian Army. My first submission for Cards for a cause. This is a small initiative by Tejal Mehta Shah and Neha Gala to make and send cards to those who will love getting a handmade card and at the same time send a little bit of sunshine into their lives. Sharing handmade kindness. Here are the pictures of my cards:


A very small contribution from my side but from the heart.

Alpna 

You can find me on:

Sunday, October 2, 2016

Accordion Pocket Album

Hello all crafty friends!!! 

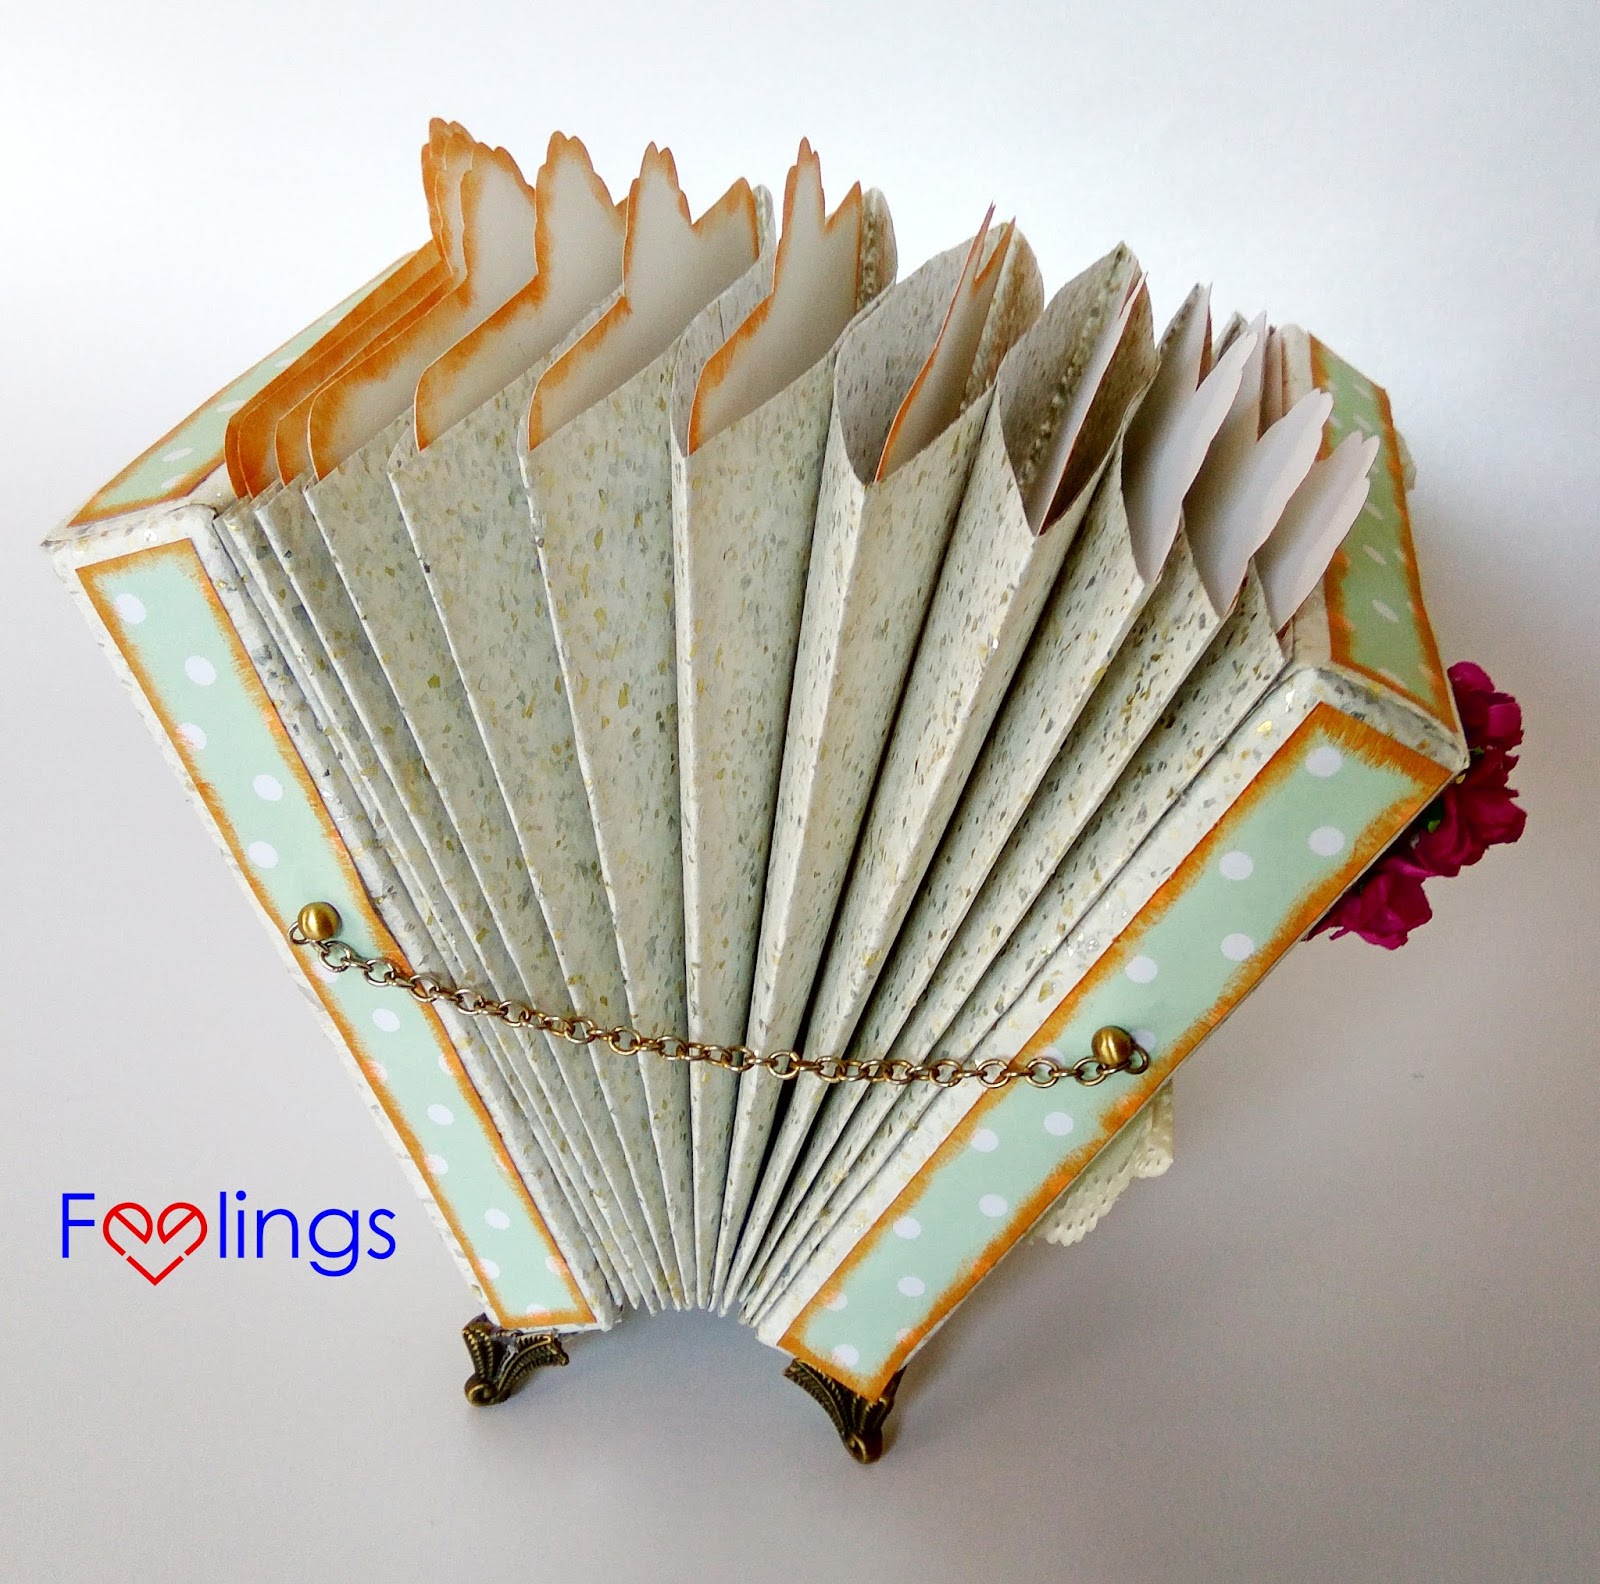
Hope you doing great. Today I'm going to share my project called 'Accordion Pocket Album'. This is my take for online challenge.

This accordion pocket album makes a great portable album to show your photos and sentiments. Also makes a fun little scrapbook/ memory book.

I made this beautiful album using white card stock, white glitter paper layered with a polka dots patterned paper, mulberry flowers, cutout of a pencil colored stamped image, brads, metal charms and so many things. It has 12 pockets with tags which can be used for photographs & journaling. Here are the photos from different angles:


Hope you like my efforts. Awaiting for your comments.

You can find me on:

I participated in
Decorate to Celebrate: Anything Goes #20
Ooh-la-la-Creationschallenges: Challenge #214

Saturday, October 1, 2016

Hello Card

Hi friends!!!

I have a card to share today featuring water color techniques. Here I used pastel shades to make background and later taken a real leaf print on it. I stamped "hello" sentiment also.


I participated in:
Watercolor challenge

Hope you will like it. Thanks for stopping.


You can find me on:

Friday, September 30, 2016

Magic of Love

Hello Crafty friends!!!

Here is my very first take for online challenge for the theme "STAR"
I made a mixed media frame using gesso, stencils, sprays, acrylic colors, chipies, flowers and hand written phrases.  Here are the close ups of my project:


Hope you will like it.

I participated in these challanges:
Scrapki Wyzwaniovo: Stars
Picture this Challange: Stars
Stamplorations: Stencil
Decorate to celebrate: Anything Goes
A inky mess
Creative Artiste: Anything mixed media goes
Polkadoodles: Anything Goes
Tuesdaytaggers: Sun, Moon, Stars

Hope you will like it. Awaiting for your comments.

You can find me on:

Monday, September 26, 2016

Tutorial for making Coconut Shell lamp shade

Hello crafty souls,

As festivals are round the corner I know all of us always strive for new inspiration. My new project will inspire you to make a beautiful lamp shade from a waste coconut shell.

Here is the procedure to make the lamp shade. First you to take a coconut and cut it like this:

Then you to scoop the coconut from center with the help of knife and spoon.


Draw the desired design on coconut and make the holes from drill machine like this:


Now put the LED Candle down and on top your lamp shade. Your lamp shade is ready๐Ÿ˜ƒ๐Ÿ˜ƒ


Please try this and decorate your home in eco friendly manner. 

Don't forget to leave your comments.

Bye,
Happy crafting๐Ÿ˜ƒ๐Ÿ˜ƒ๐Ÿ˜ƒ

You can find me on:


Thursday, September 8, 2016

Shades of distress ink to buy in starting

Hello crafty souls!!!

Hope you are experimenting new things every day. Distress ink is the important tool that every crafter use. But those who are new and want to buy the inks for them, they must be having a big wisdom in their mind... WHICH COLORS TO BUY IN STARTING? When I started I really had no clue where to start... ๐Ÿ˜Ž๐Ÿ˜Ž

Then I did some research and came up with the decision to buy 10 inks for me. I started with vintage photo, walnut stain, faded jeans, worn lipstick, mustard seed, peacock feather, picked raspberry, squeezed lemon, dusty concord and festive berries.

It is very important that you should know your requirements before choosing the colors:
*If you want to give your project vintage and antique look you should go for walnut stain and vintage photo.

*If you want to highlight the edges you can choose the medium shade of that particular shade.

*If you want to make the background then you should choose those colors which blend which other nicely. I choose one basic color and it's light and dark shade.


Shades of pink, red, purple blends beautifully, shades of blue, green and yellow blends well. Brown shades gives vintage look.

I segregated the shades accordion to their colors below:

Brown:  Vintage photo , Antique linen(l), walnut stain(d)

Black: Black soot

Green:  Shabby China, bundled sage / crushed olive(l), peeled paint (d)

Blue: Broken China, tumbled glass (l), faded jeans/chipped sapphire(d)

Pink: Worn lipstick, spun sugar(l),  Victorian velvet(d)

Yellow: Wild honey/ musturd seed

Orange: Rusty hinge

Purple: Milled lavender/dusty concord

Red: Fired brick/ Aged mahogany (reddish brown)

Grey: Old paper/ weathered wood

** Here (l) stands for light and (d) stands for dark

Bright colours

Blue: Salty ocean, Peacock feather

Pink: Picked raspberry

Green: Mowed lawn

Yellow: Squeezed lemonade

Orange: Ripe persimmon

Red: Festive berries

This is my list... Don't be afraid to experiment and create your own list.

Thanks for stopping on my blog. Any feedback or suggestions always welcome.

You can find me on:

Tuesday, August 23, 2016

How to Store Artistry inks

Hello all crafty souls. Hope you all are fine and inspire yourself with the new projects. We all use distress inks for various projects or I can say for every project.

How many of you are using Artistry inks?

I am using these inks from few months. These inks comes in very good shades and the colors are very bright and vibrant. The quality of these inks are very good. These inks are easily blend and reacts very beautifully with water but I think most of us are having problem with storing these inks.

As these inks are very juicy they overflows from the box and spoil your surface and even the box. I have two sets of mini inks pads. I kept them in the drawer but after one month it started overflowing....๐Ÿ˜ฅ๐Ÿ˜ฅ


I wiped the ink pads with tissue and kept it straight but that doesn't worked. After some days the situation was same๐Ÿ˜“๐Ÿ˜“

I had to figure out some solution for the storage and I think I found and happy with the result๐Ÿ˜†๐Ÿ˜†

I took one sweet box and kept my ink pads straight like this:


Now the ink pads are fine and not bleeding any more. This is my personal experience and I'm not complaining the product, I'm only sharing what I felt.

Hope this article will help you to store your Artistry ink pads too. Please share your experiences also.

Thanks a ton

Bye for now!!!

You can find me on:

Thursday, June 16, 2016

Crafter in a spotlight

I'm very happy to share that today Itsy bitsy have featured me as a crafter in the spotlight for June 2016 and I won "CRAFTER IN THE SPOTLIGHT" badge 


The Biggest Craft store in India – Itsy Bitsy, has a unique way to  encourage and appreciate talented crafters. Their new initiative ‘CRAFTER IN THE SPOTLIGHT’ identifies crafters all over India and put them in the spotlight every week.
It’s an honour to be recognized by the team. Their products are really great and have always helped me give life to my artworks.
I’d like to share the interview links in this blog post:
Blog 
 http://itsybitsyindia.blogspot.in/2016/06/crafter-in-spotlight-itsy-bitsy_16.html
Video
http://www.youtube.com/watch?v=pPJ3pWFqvb8

Facebook 
www.facebook.com/showurfeelings

Tuesday, June 14, 2016

Card in a Box

Hello all crafty people!!!

Hope you are enjoying the lovely weather and doing your craft projects. I really love this weather, coffee and my craft table. Today I bring you the inspiration for a lovely card which is flat when you fold but when you opens its pops up with the different embellishments. 


I made this card for a father from her daughter on his birthday. Here are the pictures from different angles.


For this card I used blue card stock and pattern papers on it. As it a birthday card so I chose cupcakes pattern paper. 

When you open it, so many surprises pops up. A girl with a cake, flowers, gifts and sentiments. These all are stamped and water colored with Faber castle pencils. Hope you enjoyed this project. Please give your reviews. 

Thanks.... I 'll be back with some new inspiration. Till then bye.

You can find me on: